Feeds:
Posts
Comments

Hybrid Pastry

I was a bit torn over whether or not to post this recipe. The results were good – very good, in fact, and I had trouble trying not to devour the leftovers. But they could stand some tweaking and perfecting. Moreover, I’ve gone a bit overboard on the baking posts as of late – a trend quite uncharacteristic of my typical warm-weather cooking patterns.

But, thanks to the recent earthquake + hurricane + busy schedule, my kitchen experimentation has been a bit … uninspired as of late. Picture lots of cereal, a few too many tomato sandwiches and more than a few corn tortillas topped with beans and avocado. All tasty treats, but none particularly blog-worthy. 

So, I’ve opted to share with you my experience with the doughnut muffin. I have a recently-pregnant friend to thank for the inspiration for this baked good. She typically lacks much of a sweet tooth, but as her due date approached (and the baby arrived, woo hoo!), it seems sweets are high on her taste bud radar. She mentioned a fondness for a doughnut muffin that a coworker had brought into the office. Clearly, the term “doughnut muffin” gave me pause. I like doughnuts. I like muffins. So a recipe with the ease of a muffin and the flavor of a cake doughnut held massive appeal for this amateur baker.

I tweaked a recipe I discovered over at How To: Simplify. The batter couldn’t have been easier, and the texture is quite nice. The idea is that you bake a simple yellow muffin, dunk it in butter and roll it in a cinnamon sugar mixture. I found that the cinnamon sugar absorbed too quickly into the buttery muffin, which tasted fine but was visually unpleasing and left the muffin with a tacky texture. I’d recommend experimenting with dipping a muffin in the cinnamon sugar mixture sans-butter, or increasing the proportion of sugar to cinnamon – the end result you’re looking for is a muffin thoroughly dusted in a lovely coating of cinnamon sweetness. I MIGHT even experiment with lining the muffin tins with cinnamon sugar, pouring the batter and then sprinkling the top of the batter with more cinnamon sugar.

Make sure you have friends over when you prepare this recipe – the doughnut muffins taste best on the day they’re baked, preferably served hot with a glass of cold milk.

Doughnut Muffins

  • 1 3/4 cup all-purpose flour
  • 1 1/2 teaspoons baking powder
  • 1/2 teaspoon salt
  • 1/2 teaspoon cinnamon
  • 1/3 cup canola oil
  • 3/4 cup sugar
  • 1 egg
  • 3/4 cup buttermilk
  • 1/4 melted butter
  • 1/3 cup sugar and 1 tablespoon cinnamon, for coating

Preheat oven to 350 degrees and spray muffin tin with non-stick cooking spray.

Then,

Combine dry ingredients – flour, baking powder, salt and cinnamon – in a medium bowl using a spoon or fork to stir together.

Next,

Combine wet ingredients – oil, egg and milk – with sugar in a large bowl. Add dry ingredients and stir together until just combined. 

Now,

Bake 17-20 minutes, until a toothpick removed from the center of the muffin has just one or two crumbs clinging to it. Cool for 5-10 minutes on a baking sheet, in the tins.

Then,

Use a butter knife to unmold the muffin. Mix the cinnamon and sugar together. One by one, dip each muffin first in melted butter, then in the cinnamon sugar recipe (see my notes above if you want to experiment with a different method).

Finally,

Place muffins on a wire rack to cool slightly before serving.

Bite-Sized Goodness

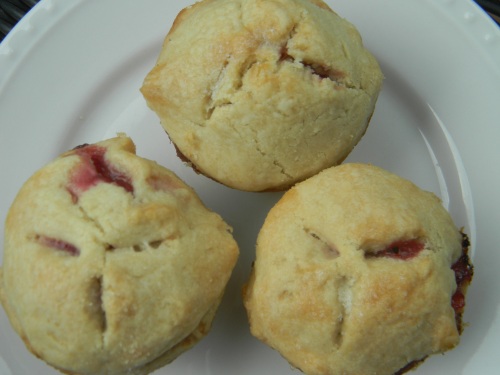
Miniature versions of just about anything are universally accepted as the ultimate in cuteness. Puppies? Yup. Babies? Them too. These miniature pie bites are no exception to the rule. 

But the real question at hand for Miss Menu is, how does size affect taste? Is the proportion of crust-to-filling acceptable? Can a mini-pie hold a candle to a traditional wedge sliced from a 9-inch pie plate?

The original version of these miniature pies over at Crepes of Wrath (love the name) called for a blueberry filling. While I’m a fool for blueberries in my everyday life, blueberry pie does not rate at the top of list of fruit favorites. I remembered achieving a certain degree of success a few years back when I served a free-form, rustic tart stuffed with nectarines and raspberries. Something about that particular combination is my idea of the perfect mixture of texture and flavors. So, I decided to tweak this recipe for a recent celebratory picnic – but feel free to tweak it right back.

Now, here’s a note on a few things I didn’t do that I’d advise that you do do.

  1. I didn’t serve with homemade vanilla ice cream. You really should. Or maybe homemade cinnamon ice cream, eh? And certainly nobody shall call the dessert police if you use Edy’s as a stand-in.
  2. I didn’t use arrowroot powder. I knew I should. Cornstarch works, but lends a slight chalkiness of texture and muddiness of flavor, to my taste buds, at least.
  3. I didn’t roll my crust thin enough. I also didn’t use a proper biscuit cutter. I let nostalgia get the best of me, perhaps, and used the vintage juice glass that my mom used to use to cut biscuits when I was a kid. But with such a tiny bite, you’d be wise to use a properly sized cutter – no bigger than 2 inches across – and roll it thinly to produce the appropriate ratio of filling to crust.

Now, even when you roll the crust to just the right width, this is still going to be a bit more crust-heavy than your traditional pie. Lucky for this girl, I’m a crust fanatic. The recipe I used was one that mixes butter and Crisco to be both buttery AND flaky – but feel free to use your own all-butter crust, if you’re a butter purist. I’d trust this Smitten Kitchen recipe.


Peach-Raspberry Pie Bites

Serves 24.

For the Pie Crust:
3 3/4 cups all-purpose flour
3 tablespoons granulated sugar
1/2 teaspoon kosher salt
2/3 cup unsalted butter, cold, cut into pieces
2/3 cup shortening, cold
2/3 cup ice water, plus more as needed
4 teaspoons distilled white vinegar, chilled
2 tablespoons room temperature butter
1 egg yolk, for the egg wash
1 tablespoon water
1-2 tablespoons additional sugar 

For the Filling:

½ pint raspberries
2 ripe peaches, peeled and diced
1 tablespoon arrowroot powder
1/3 cup sugar

Food Processor Method: Combine flour, sugar and salt in bowl of food processor. Add cold butter and shortening, pulsing to combine until fat is pea-sized. Mix together cold water with vinegar and add to mixture, one tablespoon at a time, pulsing between each addition until a dough forms. You probably won’t use all of the liquid.

Or,

Pastry Cutter Method: Combine flour, sugar and salt in a large bowl. Add cold butter and shortening, using a pastry cutter or two forks to blend fat into dry ingredients until pea-sized clumps form. Mix together cold water with vinegar and add to mixture, one tablespoon at a time, turning dough with forks and incorporating liquid into the mixture until a dough forms. You probably won’t use all of the liquid.

Then,

Turn dough onto a piece of plastic wrap and form into a ball. Wrap well and place in the refrigerator for at least an hour (but only if you have a really cool fridge – two to three hours is more likely). I made mine the night ahead.

Meanwhile,

Mix the fruit together in a large bowl and sprinkle with sugar and arrowroot powder. Stir well to combine and set aside.

When dough is chilled,

Remove dough from fridge and divide into two halves. Place one half back in fridge. Roll the remaining half nice and thin, about 1/8 inch thick, between two sheets of waxed paper. Cut 24 rounds from the dough. Keep in mind that you might not be able to get 24 rounds on the first roll-out – you might have to collect your scraps, stick them in the fridge for a few minutes and then re-roll to eke out all 24 rounds.

Then,

Preheat oven to 400 degrees. Spray your mini cupcake tin with non-stick cooking spray. Tuck a round of dough into each of the 24 cups. Shmear each round with room temperature butter (I used a pastry brush, but a spoon would also suffice). This will help prevent the crust from becoming too soggy. Place the cupcake tin in the freezer while you roll out the remaining dough and, once again, cut out 24 rounds.

Next,

Remove tin from freezer and spoon a heaping tablespoon-full of fruit mixture into each cup. Top with another round of dough and pinch to seal the edges. Make three slits in top of crust. Whisk together egg yolk with 1 tablespoon water. Using a pastry brush, spread the wash lightly on top of each pie, then sprinkle with sugar.

And finally,

Bake for about 20 minutes, until crust starts to brown just a bit around the edges. Allow pies to cool in tins on a cooling rack before loosening around the edges with a butter knife and popping them out. Don’t forget to serve with ice cream!

Roundup time! Here are a few quick pics – some of which have been lingering on my memory card far longer than others – that are worth sharing.

As a well-chronicled fan of the muffaletta, I was happy to give the sandwich another spin.

Sandwich rounds were the vessel for this version, stuffed with the traditional olive spread, mortadella, salami and provolone. The mini-muffalettas received a quick turn on the grill pan before I packed them up for a picnic, where they were well received at room temperature.


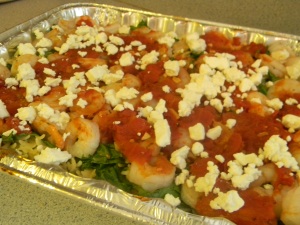
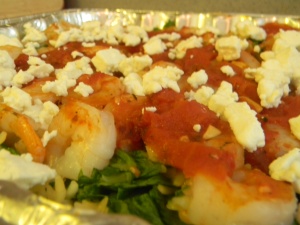
I’m almost literally in constant search of what I call the “sophisticated” casserole: a dish fancy enough for entertaining that still comes together easily in a one-pot meal.

This Greek Shrimp Casserole from the Washington Post fits the bill. I prepared a pan for a pregnant friend and froze it for some easy eats after baby arrives.

Truth be told, I can’t remember exactly which recipe I used to produce these fudgy brownies. But given the inherent beauty of this favorite dessert, I thought the picture was too pretty to pass up!

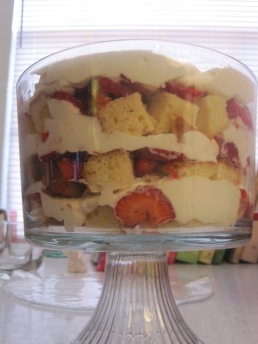
I love a trifle for so many reasons. It comes together in a snap; it’s hard to mess up; store-bought ingredients are not only acceptable, but encouraged; it is, by its very nature, a forgiving dessert; it can be adapted easily to whatever ingredients you have on hand – angel cake and blackberries, pound cake and strawberries, sponge cake and blueberries; it’s best received when made in advance; and, inevitably, the results are tasty. And did I mention that, layered sky-high in a lovely trifle dish, this dessert is quite the looker? What’s not to love?

If you’re like me, you like pizza. Maybe you’d go so far as to describe yourself as being moderately obsessed with pizza. Perhaps, if you were forced to spend eternity on a desert island with only one food, you wouldn’t think twice to name pizza as the one dish you’d dine on for the rest of your life. And maybe, just maybe, you’ve spent countless hours devoted to finding the best way to make your own pizza at home.

Now, since we all don’t have the luxury of pulling a Gwyenth Paltrow and building a wood-burning pizza oven in our backyard, the rest of us have to get creative – and resourceful. My absolute fave method for preparing pizza at home is outdoors, as nature intended, on a hot grill. It’s fast, messy and festive, and produces a crispy, superior crust in a flash. Sadly, being an apartment dweller creates an added obstacle in my pizza-making-experimentation. I’m sadly grill-free chez Menu.

Moreover, my kitchen is quite free of any form of ventilation. Anytime I turn the oven on over 400 degrees results in a low level of smoke and a high level of noise from my too-sensitive-but-fully-operational smoke alarms. (Side note: do I really need four smoke alarms in a less-than-900-square-feet apartment?) When performing your own, personal pizza-making research, the first thing that professional pizza-makers will drill in your brain is that you must, must, must crank your oven up to the highest degree possible. And use a pizza stone. After borrowing Mother Menu’s pizza stone for a test run, my beloved smoke alarms had a fit. Apparently, the oils absorbed by the stone do not interact well with my particular brand of kitchen.

I thought I might be on to something when I came upon another category of pizza recipes that call for using the broiler. But my lovely apartment, always conspiring against my pizza consumption, got in the way again with its awkward drawer-style broiler that won’t fit a sizable pan in it.

So here’s the method I developed. I won’t say it’s the most perfect in the world – but it’s the most perfect method for my imperfect, but loveable, little apartment kitchen. It’s inspired by countless recipes I scoured from the Web – but since none fit my kitchen’s peculiarities, I tweaked and adapted and am pretty darn happy with the results.  And since I figure I just can’t be alone in my pizza-making-predicament, I thought I’d share the fruits of my laborious research.  Here’s what to do.

1. Make or buy your dough. I’ve convinced that the dough I purchased through local Richmond company Pizza Tonight is near perfect. I love it. You know how, when you order pizza from a takeout place, everyone fights over the piece of pie that has a huge, charred bubble of doughy goodness on the outer crust? Well, every pie I’ve made with Pizza Tonight dough has resulted in multiple bubbles. More on Pizza Tonight later. If you’re set on making your own dough, I’d recommend this recipe from the Washington Post.

2. Pick a day when you’re experiencing neither blizzard nor heat wave in your community. Open as many doors as possible and turn on all the fans in the house. (Fortunately, to accompany my four smoke alarms, my landlord thoughtfully provided four ceiling fans.) Voila, make-your-own ventilation!

3. Adjust an oven rack to the very lowest setting, closest to the base heating source. Crank up the oven to (gasp) 425 degrees, giving it a good 20-30 minutes to make sure it’s good and hot. (Of course, if you’re in a kitchen with proper ventilation, feel free to preheat to 500 degrees – you’ll likely get better, and slightly quicker, results.)

4. Heat a well seasoned cast iron skillet on the stove top over medium-high heat.

5. While the oven and pan preheat, prepare your dough. Dough should already be at room temperature. If you’re working with a damp dough, cover the ball lightly in flour before holding it in one hand and allowing gravity to do its work, letting the dough “hang”  down, using the other hand to stretch the dough into a rough circle that’s quite thin in the middle without reaching the fully-transparent stage, and no bigger in diameter than your cast iron skillet. Pizza Tonight offers an excellent tutorial on this very subject.

6. Prepare the toppings. My latest favorite combination is fully inspired by Pizza Tonight which, in addition to selling kits of dough and sauce, also sells fresh-from-the-oven baked pies on-site at local farmers markets. I sampled a slice of their Fig & Pig creation and was hooked: fresh figs, prosciutto and Gorgonzola cheese. Yum. For my version, I opted for a combination of pesto, dried figs, fresh mozzarella and prosciutto, layered in that order and using just the thinnest layer of pesto.

7. Nestle the dough carefully in the cast iron skillet and add toppings.

8. Bake for about 8 minutes.

On my first try, I over-baked in hopes that the top crust would magically char. But without an upper heat source (i.e., from a broiler), that’s just not going to happen, so don’t make my mistake. Taking the pizza out after 8 minutes yielded a pizza that was the perfect mixture of crispy and chewy – and thanks to the skillet I still enjoyed some of those tasty char marks on the bottom of the pizza.

So that’s my journey. My greatest discovery? Every pizza is as unique as the kitchen that produces it. So, unless I stay in this particular apartment for life, I’m looking forward to more pizza discoveries in newer and greater kitchens in the future!

I just had to show a few quick pics from a celebratory baby shower a couple pals and I recently hosted for a certain amazing friend who occasionally goes by the moniker of Cookbook Queen here in the blogosphere. With baby’s arrival looming on the horizon, we wanted to help our friend prepare for her own little Cookbook Prince or Princess (it’s a surprise!).

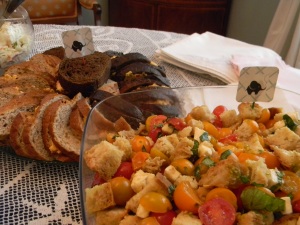
Us co-hostesses divvied up the menu, deciding on a traditional, southern-style spread of pimento cheese sandwiches, tarragon chicken salad on croissants, ham biscuits with provolone and poppy seed, fruit kabobs, a panzanella salad and coleslaw. And in case you’re wondering about the little elephant flags punctuating some of the dishes below, those were inspired by the invitation, which encouraged guests to help us celebrate our friend’s little peanut!

In lieu of a cake, we opted for a Milk & Cookies Bar. Our selections? Chocolate Toffee, Snickerdoodle and Oatmeal, Cranberry & Walnut.

A make-your-own candy bar let our guests depart on a sweet note, each taking home a mini-mason jar full of treats. One of the co-hostesses practically specializes in adorable ideas for party favors.

And to wash it all down, we offered fresh peach bellinis, with champagne and cider options for our guests. Frozen blueberries were a festive garnish.

Now we just have to wait for the little guy or gal to arrive!